Authorized Distributor

Free Shipping For Orders Over $50

Cracks In Pottery: Why They Happen And How To Prevent Them


Why Does Pottery Crack?

By its very nature pottery is delicate and is susceptible to cracking. Cracking is mainly caused by uneven drying of the piece, meaning that some parts of the pottery shrink more than others. The key to avoiding these pitfalls is to create a consistent environment for drying the piece and undertaking the necessary preparation to ensure that the entire piece dries at a similar rate.

In this article, we go over some of the most common causes for cracks to appear in your pottery piece and how to prevent them.


Thickness of the Piece

One of the main reasons that cracks form in pottery when it is being dried is often down to the differences in thickness of different parts of the piece. This is why the base of a pot or vase often cracks more frequently than the sides or lips of the piece as it is generally thicker and therefore takes a lot longer to dry. The obvious way around this is to try and ensure that all parts of the piece are of an even thickness, either by judgement or by using a tool of measurement.

Another similar cause for cracks is the intricate nature of the design. Those with intricate designs tend to have varying thickness, especially around handles or lips. The way to negate this effect is to try and make your designs simpler or to ensure that intricate parts of your design have a similar thickness to other areas. Additionally, when firing the clay, you can cover certain elements that you do not wish to dry as quickly by using a material such as wax resist, which helps to prevent moisture loss as quickly.


Inconsistent Drying

There is a lot of water in clay (around 20%). Therefore the evaporation of the water from the clay can be inconsistent. When one part of the piece dries more quickly than another it puts the entire structure under strain and thus causes cracks.

Larger pieces of pottery are more susceptible to cracking, mainly due to the fact that the surface of your ware is likely to dry quicker than the deep layers. One way to prevent this from happening is to try and ensure that the ware is turned when heated so that all surface areas are receiving an even heat. Alternatively, you could place your wares on a rack within the oven so that the airflow is even all around the piece. As long as you run your heat cycle for a sufficient amount of time then you should have a consistent product at the end.

It is essential to ensure consistent drying across your piece. Once the piece has been dried, it is much harder to repair a crack and even though there are solutions, none are truly perfect. As the heating/drying stage is the vital element of this process, it’s crucial that your kiln can achieve the results that you need and makes the job of consistent drying much easier.


Uneven Firing

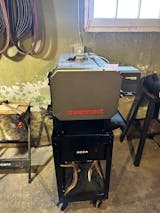
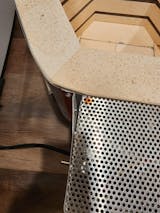
Uneven firing is another reason that pottery can crack. To remedy this, you need to be able to control the heat, length and drying capacity of your kiln. This can be best achieved with an electric powered kiln, where length of cycle, temperature and even heating can be controlled. Soul Ceramics has an extensive range of electric powered kilns to enable an even heating program.


The Type of Clay

The type of clay you are using can also have an effect on whether the pottery cracks when dried. Clay with a high level of plasticity tends to crack more when drying. Consider using clay that contains ‘grog’ which has been fired and ground before being added to the clay. The grog enables the particles in the clay to space and therefore allow moisture to come to the surface and evaporate more easily.


Clay Preparation

Preparation of the clay is key. If your clay block has not been sufficiently wedged it will have varying amounts of moisture in different parts of the clay. Therefore some parts will be denser and drier and will therefore dry at a faster rate than the wetter parts of the clay. Ensuring that you undertake sufficient wedging of the clay will ensure an even block from which to work from that shares similar properties throughout.


Joints

Finally, joints in your pottery piece can cause cracks as these are often areas of weakness and variable thickness. Joining your pieces well by scoring the areas that they are going to meet and using slip painted on the scored areas before joining the two pieces will ensure a well joined piece.

In case your pottery did crack, read our guide to repairing broken ceramics.


How to fix cracks in bone dry clay

Encountering cracks in bone dry clay can be a frustrating experience. However there are solutions to fix cracks in bone dry clay and salvage your work.


The Slip Method

To implement the slip method for repairing small cracks in bone dry clay, begin by lightly damping the affected area with a bit of water to ensure the slip adheres properly. Craft a slip mixture by combining clay with water until it achieves a creamy consistency, akin to thick paint.

This concoction acts as a potent bonding agent, adept at seeping into and sealing minor fissures. With a fine brush or even a fingertip, apply this mixture directly into the crack, ensuring it's adequately filled.

Smooth over the surface to ensure the slip seamlessly integrates with the surrounding clay, eliminating any visual discrepancy. It's imperative to let the slip thoroughly dry, which may vary in time depending on the size of the crack and the ambient conditions.

Once dry, the area should be inspected to ensure completeness of repair, possibly applying a second layer of slip if the crack was not fully covered in the initial application.


Reinforcing Larger Cracks with Coils or Slabs

Addressing more substantial fissures in bone dry clay necessitates a technique that not only fills the crack but also fortifies the compromised area to prevent future damage.

This is where the integration of coils or slabs comes into play, offering a robust solution for mending wider gaps.

Begin by preparing a piece of clay, shaping it into a coil or cutting it into a slab that adequately surpasses the dimensions of the crack. This ensures that there is sufficient material to both fill the void and blend seamlessly with the surrounding clay for a cohesive repair.

Moisten the area surrounding the crack slightly to improve the adhesion of the new clay. Carefully position the coil or slab over the crack, applying gentle pressure to embed it firmly into place.

The objective here is to achieve a bond that feels natural and secure, eliminating any signs of the original crack.

Using sculpting tools or your fingers, meticulously smooth the edges of the added clay into the existing surface. This step is crucial for maintaining the integrity of the piece’s design and ensuring that the repair is imperceptible.

Once the additional clay has been successfully incorporated and the area is smooth, allow the repair to dry thoroughly.


Epoxy or Resin Repairs for Deep Cracks

Epoxy or resin can provide a strong, lasting solution to significant cracks. Begin this repair method by carefully preparing the cracked area.

It’s essential to ensure that the surfaces to be joined are clean and free from any loose clay particles or dust, as this can affect the bonding quality of the epoxy or resin.

Once the area is prepped, mix the epoxy or resin according to the product's specific instructions. Accuracy in mixing ratios is key to achieving the optimal strength and curing time.

Apply the mixture precisely into the crack, taking care to fill it completely. A toothpick or a small applicator can be helpful for this task, allowing for meticulous application even in the narrowest of spaces.

After applying the adhesive, use clamps or tape to hold the pieces together tightly if the structure permits, ensuring the crack remains closed as the epoxy or resin cures.

This step is critical, as movement during curing can weaken the bond. The curing time can vary widely depending on the product used, so refer to the manufacturer's guidance for how long to wait before removing any clamps and handling the piece.

Once cured, there may be excess epoxy or resin that has seeped out of the crack or isn't perfectly level with the rest of the piece.

Gently sanding this excess material can help to smooth out the repair, making it nearly invisible to the eye and touch.


Please contact Soul Ceramics if you would like further advice on your ceramics project and we will be happy to help.


Additional resources on pottery