Authorized Distributor

Free Shipping For Orders Over $50

A Mini Guide To Bisque Firing [Tips & Tricks!]

What Is Bisque Firing?

Bisque firing is the process to transform unfired bone-dry clay from its fragile state to a porous and durable state (called ceramic) for the second stage of firing. This stage of the process is essential if you intend to safely decorate your work or apply underglazes and glazes to the piece without damaging or cracking it.

white pottery


Typically ceramics are fired in two stages, the first stage is known as the bisque firing and the second stage is known as the glaze firing. The bisque firing process needs to be done under a very controlled heat, as the clay is put in a kiln and heated slowly and then also cooled slowly. This enables the pottery to become porous and able to handle water-based paints without it cracking or failing.

The finished piece also becomes stronger, and a harder ceramic with better porosity is perfectly prepared for the application of glazes. The second stage, called glaze firing, is done after the potter has applied paints, underglazes and glazes to the piece. This is a more drawn out process than bisque firing, depending on the cone temperature that you choose to fire to.

In essence, the purpose of bisque firing is to:

  • Harden the clay into ceramic, as well as making it porous and therefore suitable for glazing
  • Ensure that the paints, glaze and underglaze bonds well to the ceramic surface
  • Remove any residual moisture to ensure that the finished piece is strong and can withstand further processes
  • Ensure that the ceramic doesn’t fall apart or crack


How to achieve the bisque firing process using a kiln

The best program for the kiln to work is a Cone 06, 05, or 04 at a slow speed. The bisque firing duration may be different depending on the size and thickness of your piece. Bisque firing is best done using an electric kiln as you can control the temperature and length requirements easily.

The vital instruction here is to heat the kiln up slowly and then ramp it up bit by bit - this can take anywhere between 3 and 8 hours depending on the power of your kiln. Once the kiln has reached its optimum temperature it will also need to cool down very slowly. It may be wise to allow the kiln to cool overnight before removing your wares.


What is the best temperature for bisque firing clay?

There is no exact science to the bisque firing temperature required for bisque firing. However, the ideal range is usually between cone 06 to cone 04, regardless of your clay and glaze temperature. 

There are reasons why you might choose to fire at one temperature as opposed to another, for example:

  • Firing at cone 06 causes the clay to shrink and become porous and therefore will easily accept glaze. 
  • Firing to cone 04 increases the pottery’s strength and durability.

Generally, a higher bisque firing temperature will result in a less porous ceramic. For example, if you want a finished piece with higher porosity and that can easily absorb glaze then you should bisque fire at a lower temperature.

white ceramic pots with shadow


How to load a kiln for bisque firing

The process of loading a kiln for bisque firing is relatively straightforward:

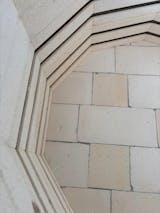
  • Mount the bottom shelf at least 1 inch above the surface to aid circulation.
  • The wares should also be at least 1 inch away from the elemental walls 
  • Leave up to 1 to 1.5 inches of space between the piece and the top shelf. The kiln cover should be 1.5 to 2 inches away from the ware.
  • You can stack the wares together in a bisque firing. 
  • If you are using a half shelf, leave a 1/4 inch gap if they are side by side.


What will happen if you skip the bisque firing stage?

Technically, it’s possible to skip the bisque firing stage and start with glaze firing instead. However, firing the ceramic without the bisque stage can cause it to crack or fall apart as it is not prepared to accept the different material and also to be fired at the heat required for glazing. 

Additionally, the chemically bonded water molecules and organic gases in the ceramic that should be removed during bisque firing can cause the glaze to bubble or get pinholes.

The glazes and underglazes may not adhere to the surface properly as the ceramic is not porous enough. Ultimately, it risks ending up with a ruined project and a lot of wasted time.

Skipping the bisque firing process can also cause the pottery to crack if the clay and glaze are not fired slowly enough and if the ware wasn’t fired to the correct temperature in the bisque firing stage, some moisture will still be left in the clay. In summary, in spite of the fact that it is a much longer process, bisque firing is best to do as it ensures that the glazes and decorations adhere perfectly to the object and that your project is finished well.

brown ceramic pottery


Bisque Firing Schedule

Each element of the bisque firing schedule, from the initial temperature ramp up to the final cooling stage, serves a purpose in creating your ceramic masterpiece. The process is a delicate dance of heat and timing, but once mastered, it opens the door to limitless creative potential.


The firing ramp

In bisque firing, the firing ramp is an integral element - it dictates how quickly the kiln's temperature ascends, a factor that plays a crucial role in the successful completion of your bisque firing.

For most, a gradual increase is widely recommended because it provides the moisture still entrapped within the clay body a safe passage for escape, preventing the dreaded cracks or potential explosions within the kiln.

Think of it as a pressure cooker releasing steam - if the heat rises too quickly, the pressure build-up from the trapped moisture could cause your ceramic piece to crack or even explode.

A slow and steady temperature climb allows the clay to breathe, releasing the moisture steadily without causing any damage to the piece.

So remember, patience is key during the firing ramp stage.


The stages of bisque firing schedule

There are 3 main stages to bisque firing: the evaporation stage, the quartz inversion stage, and the vitrification stage.

The evaporation stage is the first stage. The kiln is heated to around 212 degrees Fahrenheit. During this stage, any residual moisture tucked away in the clay body is gently coaxed out. It's essential to tread lightly here - rush this stage, and you may end up with cracks or even explosions, due to rapid moisture release.

Next up is the quartz inversion stage. Here, temperatures range from 1060 to 1150 degrees Fahrenheit. This is where the clay starts to strengthen and transform. The clay minerals realign and change their molecular structure, becoming more rigid and resilient. It's a crucial stage that sets the stage for glaze application later.

The grand finale in the bisque firing schedule is the vitrification stage with a high-temperature of around 1800 degrees Fahrenheit. The clay particles begin to fuse together, culminating in the birth of a durable, glass-like substance.


How long does a bisque firing take?

There are a few factors which dictate how long a bisque firing takes. The thickness of the clay, the size of the piece, and even the specifics of your kiln can all play a part in the timing of your bisque firing.

However, to provide a rough ballpark figure, a standard bisque firing typically takes anywhere between 8 to 12 hours, excluding the cooling time. This length allows for the necessary slow ramp up in temperature during the initial firing ramp stage, and the subsequent heat changes during the evaporation, quartz inversion, and vitrification stages.

One should also factor in cooling time, as it’s another component that must not be rushed. The cooling process is just as crucial as the heating one, it can take an additional 12 to 18 hours for your ceramic creation to cool down and be safely handled.

Hurrying this step might result in "thermal shock," causing your piece to crack or, in worst-case scenarios, shatter.


We have the necessary kilns to bring your ideas to reality

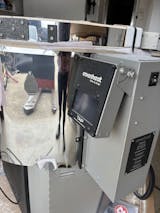
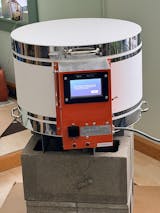
An easily controlled kiln is essential for bisque firing, as temperature control plays a crucial part in the success of your outcome. Electric kilns can modify and manage the temperature at the right heat and duration and so the bisque firing process can be well controlled.

At Soul Ceramics, we have a range of high quality electric kilns which can accommodate small or large projects. They can allow you to master both the bisque and glazing firing stages and can be easily programmed to achieve the best finished project.

If you would like to know more about our range of kilns or you are looking to invest in a kiln for a hobby or as part of a business, please do not hesitate to contact us and we’ll be happy to advise you on the most suited kiln for your project.


Additional resources on pottery